Organize, manage, and track all your work with a personal dashboard
Build a custom dashboard to manage all your personal work tasks — while also bringing in relevant info from across your Notion workspace.
- Track everything you need to do — big or small
- Basic blocks
- Databases
- Properties
- Views
- Bring company-wide context into your personal dashboard
- Linked databases
- Link previews
The best productivity system is the one that works for you.
But most software doesn’t allow you to customize it — you’re forced to shoehorn your system into a simple text list or cards on a Kanban board. What’s more, these apps probably live outside of where your team is working, so you have to bounce between multiple pieces of software to see what you need to do (then another to actually do it).
Using Notion, you can create a totally customized system that helps you organize, manage, and track everything you’re working on. And if your team is already using Notion, you can easily connect cross-functional work to your personal dashboard (we’ll show you how).
Here is everything you’ll need to build the optimal system for your own personal work dashboard in Notion.
At the core of every personal work dashboard is task management — how do we keep track of what needs to get done and when it needs to get done by?
The first step is to decide if you want to use a database. While databases are great for managing workflows with many parts, they might not be necessary for a simple list of to-do's. It all depends on the work you’re doing and and how you want to track it.
Use basic blocks if:
You prefer simplicity & speed.
Your tasks are straightforward, and are more “did you do them or did you not?”
You like that satisfying feeling of checking things off your to-do list.
Use a database if:
Your work has many parts — like a project that might require its own set of sub-tasks.
You need a way to organize tasks by sorting and filtering for specific properties.
You’re a visual person, and want to see you all your work laid out by priority level, due date, and more.
You care about being able to revisit work that was previously completed.
Our suggestion? Start simple and build on top of it. Begin with basic blocks, and if your processes require it, turn it into a tasks database. Keep in mind, the value your system delivers should always be greater than the work it takes to upkeep the system.
Basic blocks
If you decide to start simple and use basic blocks to track your tasks, then the foundation of your system will be the to-do block.
To create a to-do block, you can either type /to-do or [ ]. The to-do block allows you to easily create a checkbox item, as well as give you the ability to satisfyingly cross things off as you go. From there, you can add a due date and set up a reminder for the task if you’d like (by using the @ symbol).
Another helpful block for simple task management is the toggle block. To create a toggle, you can either type /toggle or >. The toggle block allows you to nest blocks within it so you can neatly track projects that may contain several tasks.
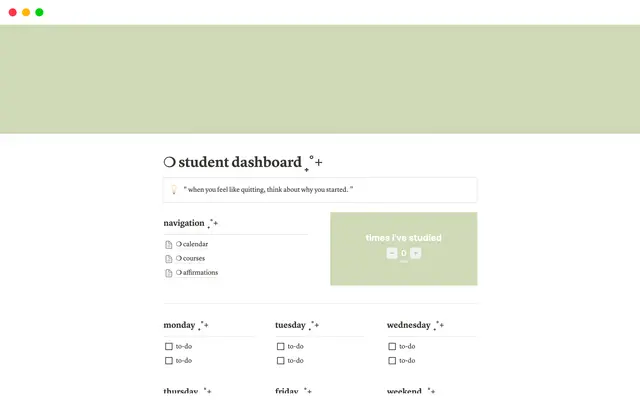
Here is a template you can duplicate that’s built using basic blocks. We organized to-do blocks in columns by clicking the ⋮⋮ symbol to drag-and-drop text, which creates side-by-side sections. Alternatively, type /columns to choose the number of columns you want to create. You can also drag-and-drop to move tasks from one column to another, or even to an “Archive” sub-page to keep a record of previously completed tasks.
Databases
If your tasks have several moving parts or dependencies, databases might be the better option for you. Databases allow you to filter, sort, and customize properties to manage tasks however you best see fit. But our advice still stands — keep things simple, and layer on functionality only if your workflow requires it.
We’ll start with a few pillars of a task management database that you can customize and iterate upon as you go.

If you need a quick primer on databases
Properties
Status — setting a
Statushelps you keep track of exactly where the task is at. Simply add aStatusproperty to your database and you can choose from three default options: “Not started,” “In progress,” and “Done.” You can also customize these to be called whatever you want.Date — by using the
Dateproperty, you can easily assign and track important dates for each task. The most common one we see is setting a due date for each task.Select — the
Selectproperty allows you to create and customize how you tag tasks in your database. Any tags you’ve created will show up as a dropdown list to choose from. We often see users leverage theSelectproperty to create tags for priority (High, Medium, Low) or the project type.
Views
Database views give you the power to customize how you visualize your tasks and surface the information you need in an instant.
Table view — tasks are displayed in rows and their relevant properties are the columns. This is a great for getting a bird’s eye view of all your tasks in one place.
Calendar view — great for planning and seeing important dates, like the
Due dateof all your tasks at once (our marketing team loves this one for their content calendar).Board view — allows you to group tasks based on properties, like
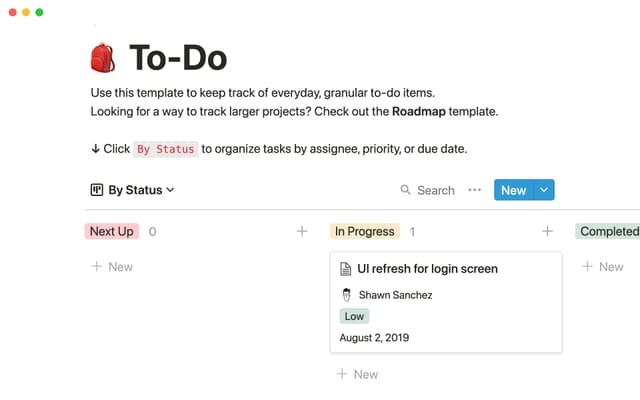
StatusorPriority. Users love the drag-and-drop functionality of the board view which allows you to seamlessly move a task from one status to another.
You can draw inspiration from this Tasks Database or duplicate it directly into your workspace. The template includes pre-built views of what we’ve outlined:
Board view organized by status
Board view organized by priority
Table view of all tasks
Calendar view of due dates
In addition to tracking your tasks, it’s also important that you’re able to contextualize how your work fits in with the rest of the organization. Notion makes it easy to add context from cross-functional teams as well as connect other tools directly into your personal work dashboard.
Linked databases
Having a through-line from your personal work to the company’s goals helps build alignment. You can see that what you’re doing directly rolls up into what the company wants to accomplish — and having them right in your personal dashboard can help bring focus to your work.
Type /linked view of database and select the source database you want to include. From there, you can use filters and sorts to customize further. For example, this company-wide goals database might have specific goals for marketing, sales, engineering, and more. But let’s say you’re on the engineering team. You can filter to only see the goals that engineering is responsible for.
When you create a linked database, remember that filters only apply to the linked database you created. However, any changes you make to the content or properties in the linked database will be reflected in the original database.
Link previews
With the power of link previews, you can bring all of your most important tools into Notion. Link previews allow you to see live, synced visualizations of links directly in Notion. This is currently supported by several major platforms (GitHub, Jira, Slack, Asana, etc.).
This gives live updates from other tools right inside your personal work dashboard — so you can build workflows with the most up-to-date information.
For example, you might have some work that’s dependent on an in-progress bug fix the engineering team is handling. You can paste a link from Jira right in your personal dashboard and see when that task has been complete, instead of needing to go into Jira and check the status of the bug fix.
Something we didn’t cover?


